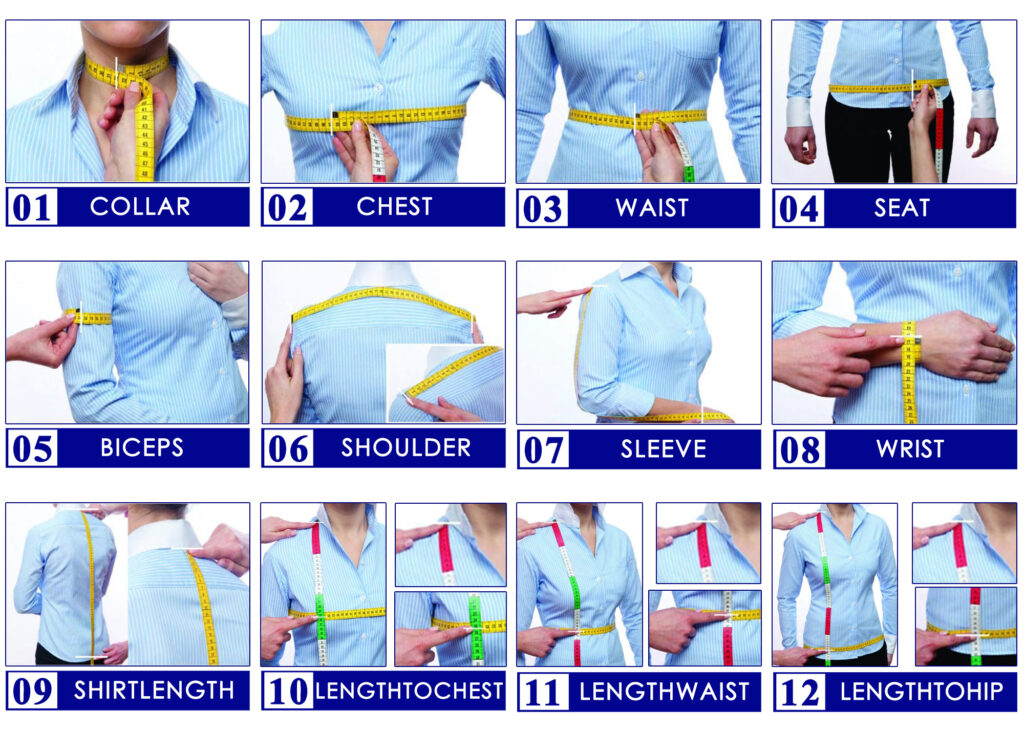
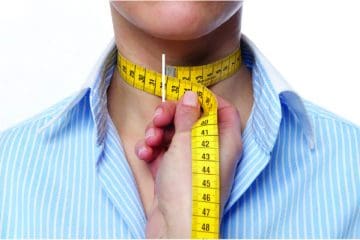
1. COLLAR
For the collar measurement, wrap the measuring tape around the base of the neck where a shirt collar naturally sits. Keep the tape snug but not tight, allowing enough room for comfort. This ensures your collar measurement provides a perfect fit for blouses, shirts, or tailored dresses.

2. CHEST
For the chest measurement, wrap the measuring tape around the fullest part of your bust, keeping it level across the back and under the arms. Stand naturally without holding your breath. This ensures your chest measurement gives a comfortable and accurate fit for tailored tops and dresses.
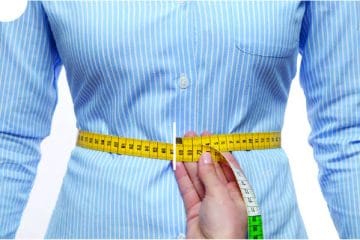
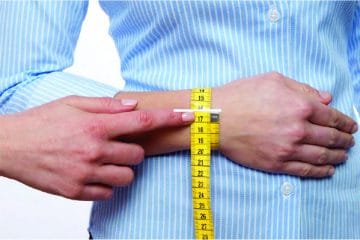
3. WAIST
For the waist measurement, wrap the measuring tape around the narrowest part of your torso, usually just above the belly button. Keep the tape snug but not tight. This ensures your waist measurement provides a precise fit for dresses, skirts, and tailored trousers.
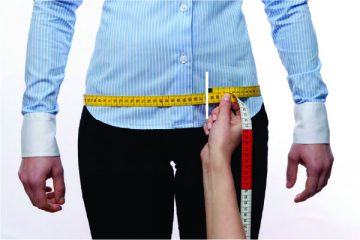
4. SEAT
For the seat measurement, stand with your feet slightly apart and wrap the measuring tape around the fullest part of your hips and buttocks. Keep the tape level and comfortable. This ensures your seat measurement gives the right fit for skirts, trousers, and fitted dresses.
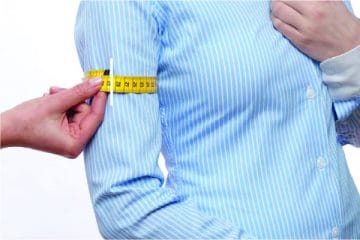
5. BICEPS
For the biceps measurement, wrap the measuring tape around the fullest part of your upper arm while keeping your arm relaxed at your side. Make sure the tape is snug but not tight. This ensures your biceps measurement provides comfort and a smooth fit for sleeves and blouses.
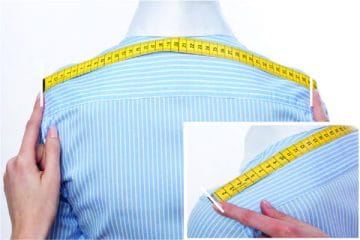
6. SHOULDER
For the shoulder measurement, stand upright and have someone measure from the tip of one shoulder to the tip of the other, straight across your upper back. Keep your posture relaxed. This ensures your shoulder measurement gives a well-balanced and comfortable fit for jackets, blouses, and dresses.

7. SLEEVE
For the sleeve measurement, start from the tip of your shoulder and measure down to your wrist bone with your arm slightly bent. Keep the tape following the natural curve of your arm. This ensures your sleeve measurement provides the perfect sleeve length for shirts, jackets, or dresses.
8. WRIST
For the wrist measurement, wrap the measuring tape around your wrist bone where a cuff would naturally sit. Keep the tape snug but not tight for comfort. This ensures your wrist measurement gives the right fit for shirt cuffs, jacket sleeves, and tailored dresses.

9. SHIRTLENGTH
For the shirt length measurement, start from the highest point of your shoulder near the neck and measure down to your desired hemline. Stand straight while keeping the tape close to the body. This ensures your shirt length measurement provides the perfect overall fit for blouses and shirts.
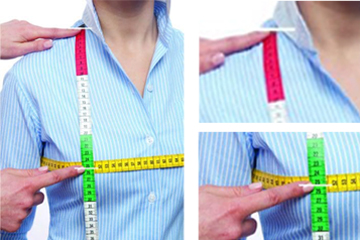
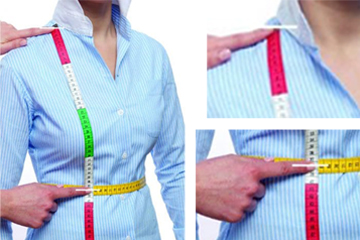
10. LENGTHTOCHEST
For the length to chest measurement, start from the top of your shoulder near the neck and measure down to the fullest part of your bust. Keep the tape straight and close to the body. This ensures your length to chest measurement helps achieve a precise and flattering fit.
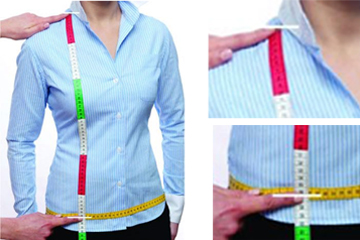
11. LENGTHWAIST
For the length to waist measurement, start from the top of your shoulder near the neck and measure down to your natural waistline. Keep the tape straight and close to the body. This ensures your length to waist measurement provides an accurate fit for dresses, tops, and tailored garments.
12. LENGTHTOHIP
For the length to hip measurement, start from the top of your shoulder near the neck and measure down to the fullest part of your hips. Keep the tape straight and close to the body. This ensures your length to hip measurement provides a precise fit for dresses, skirts, and tailored garments.